
Reaper File Maker
Auto-create Reaper Projects including timecode generator and audio file based on a data table or by scanning a directory, improving the process of preparing many Reaper Projects for a show.
Core Capabilities
Section titled “Core Capabilities”- Generate Reaper Projects
Import a list of names (scenes, tracks, etc.) from a CSV file, clipboard (e.g., from Excel), or by scanning a directory for audio files.
Each entry generates a Reaper Project file, optionally including a timecode generator and audio file. - Automatic Timecode Offset
Set the timecode generator start time based on the track’s timecode offset.
Alternatively, define a start time that automatically increments for each file. - Customizable Template
Import your own Reaper Project template file (.RPP) and use placeholders to dynamically insert data from your table or directory.
Step-by-Step
Section titled “Step-by-Step”- Prepare Data:
- Create a list in Excel (or your preferred software) or prepare a folder with audio files.
- Import Data:
- Configure your preferred import settings (such as Timecode Offset, Default Length, etc.).
Before importing CSV files, you can configure the CSV format in the Settings page. If you’re unsure about the format, open the CSV file in a text editor to check its first line. - Use Import File to import data from a Comma-Separated Values file (.csv), Import Clipboard to paste data from applications like Excel, or Scan Directory to import audio files from a folder.
- Configure your preferred import settings (such as Timecode Offset, Default Length, etc.).
- Set Export Preferences:
- Set an optional path prefix if your audio files will be in a subfolder relative to the Reaper Project files.
- Export Projects:
- Export all Reaper Project files to your chosen folder.
User Interface
Section titled “User Interface”Template Options
Section titled “Template Options”- Import Template (*.RPP): Import a Reaper Project file to use as a template. See the custom template section below for more details.
- Download (icon): Download the currently used template.
- Reset (icon): Remove the custom template and revert to the default template.
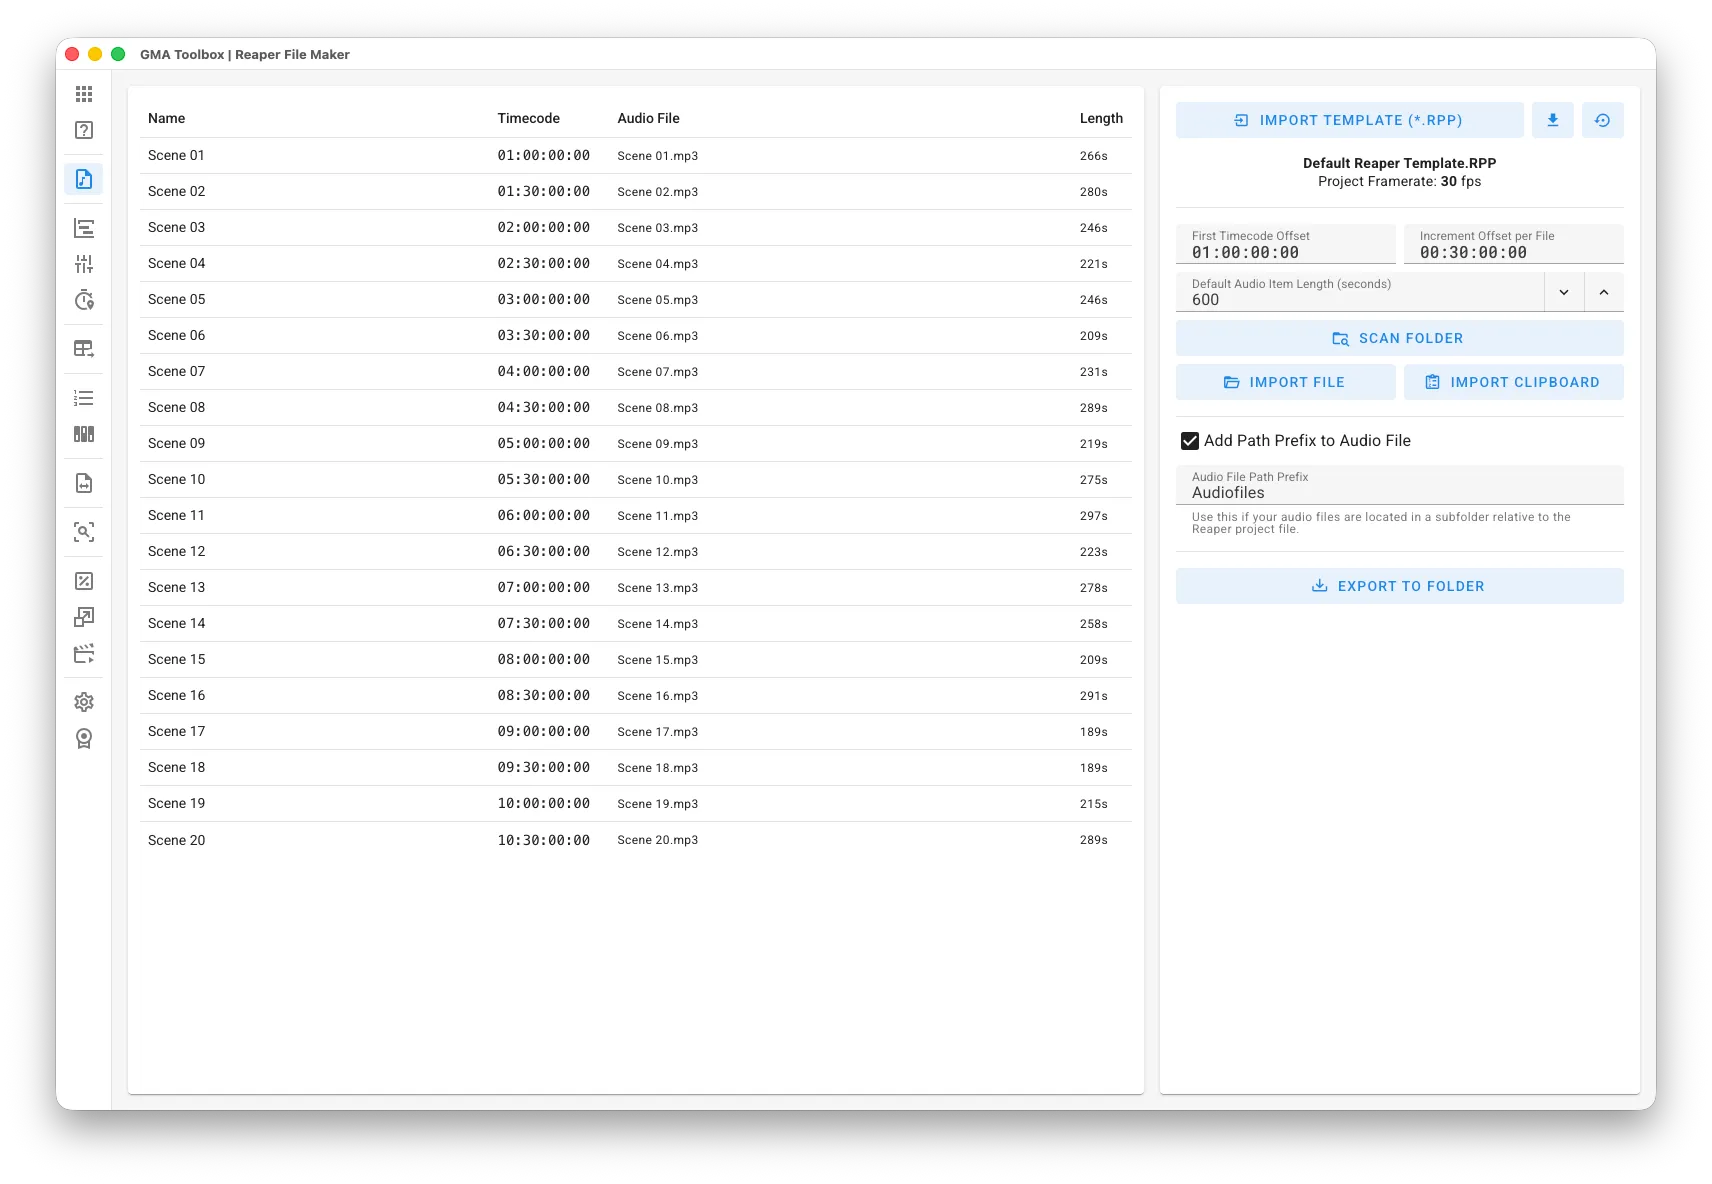
Import Options
Section titled “Import Options”- First Timecode Offset: The timecode offset for the first file.
- Increment Offset per File: The timecode offset increment applied to each subsequent file.
- Default Audio Item Length: Set the default length for audio files when no length is specified or detected.
Export Configuration
Section titled “Export Configuration”- Add Path Prefix to Audio File: Add a path prefix to the audio file path in the generated project file. This is useful if the audio files will be located in a subfolder relative to the Reaper Project files.
- Audio File Path Prefix: Set the prefix to be added to the audio file paths in the Reaper Project files. Do not add a trailing slash, as it will be added automatically.
Table Fields
Section titled “Table Fields”- Name: The name of the resulting Reaper Project file, which will be used as the filename.
- Timecode: The imported or generated timecode offset, which will be used as the start timecode for generator tracks.
- Audio File: Optionally, the audio file which will be added to the project file.
- Length: Optionally, the length of the audio file.
Advanced Functionalities
Section titled “Advanced Functionalities”Custom Template
Section titled “Custom Template”You can upload your own Reaper Project file to use as a template for the generated projects.
The projects will be copied from the template and placeholders will be replaced with the corresponding values from the data table or directory scan.
- Timecode Generator: Use the tag
#TIMECODEin the track name to identify the timecode generator track. One generator item must be present in the track. - Audio File Item: Use the tag
#AUDIOFILEin the track name to identify the track where the audio file will be inserted. The track must be empty.
Timecode Generator
Section titled “Timecode Generator”To include a timecode generator in your projects, add a timecode generator track to your template and configure your preferred settings (MTC or LTC, User-Bits, etc.).
Make sure to include the tag #TIMECODE in the track name so the tool can identify which track to modify with the timecode offset.
The track must contain exactly one generator item.
During export, the generator start time will be set to the timecode offset, and the tag will be replaced with the actual timecode offset for better readability.
Audio File Item
Section titled “Audio File Item”To include an audio file in your projects, add an empty track to your template.
Make sure to include the tag #AUDIOFILE in the track name so the tool can identify which track to add the audio file to.
The track must be empty and not contain any items.
During export, the audio file will be inserted into the empty track, and the tag will be removed for better readability.