
Macro Generator
Turn a data table into grandMA macros using your own templates, so repetitive command typing becomes a single export.
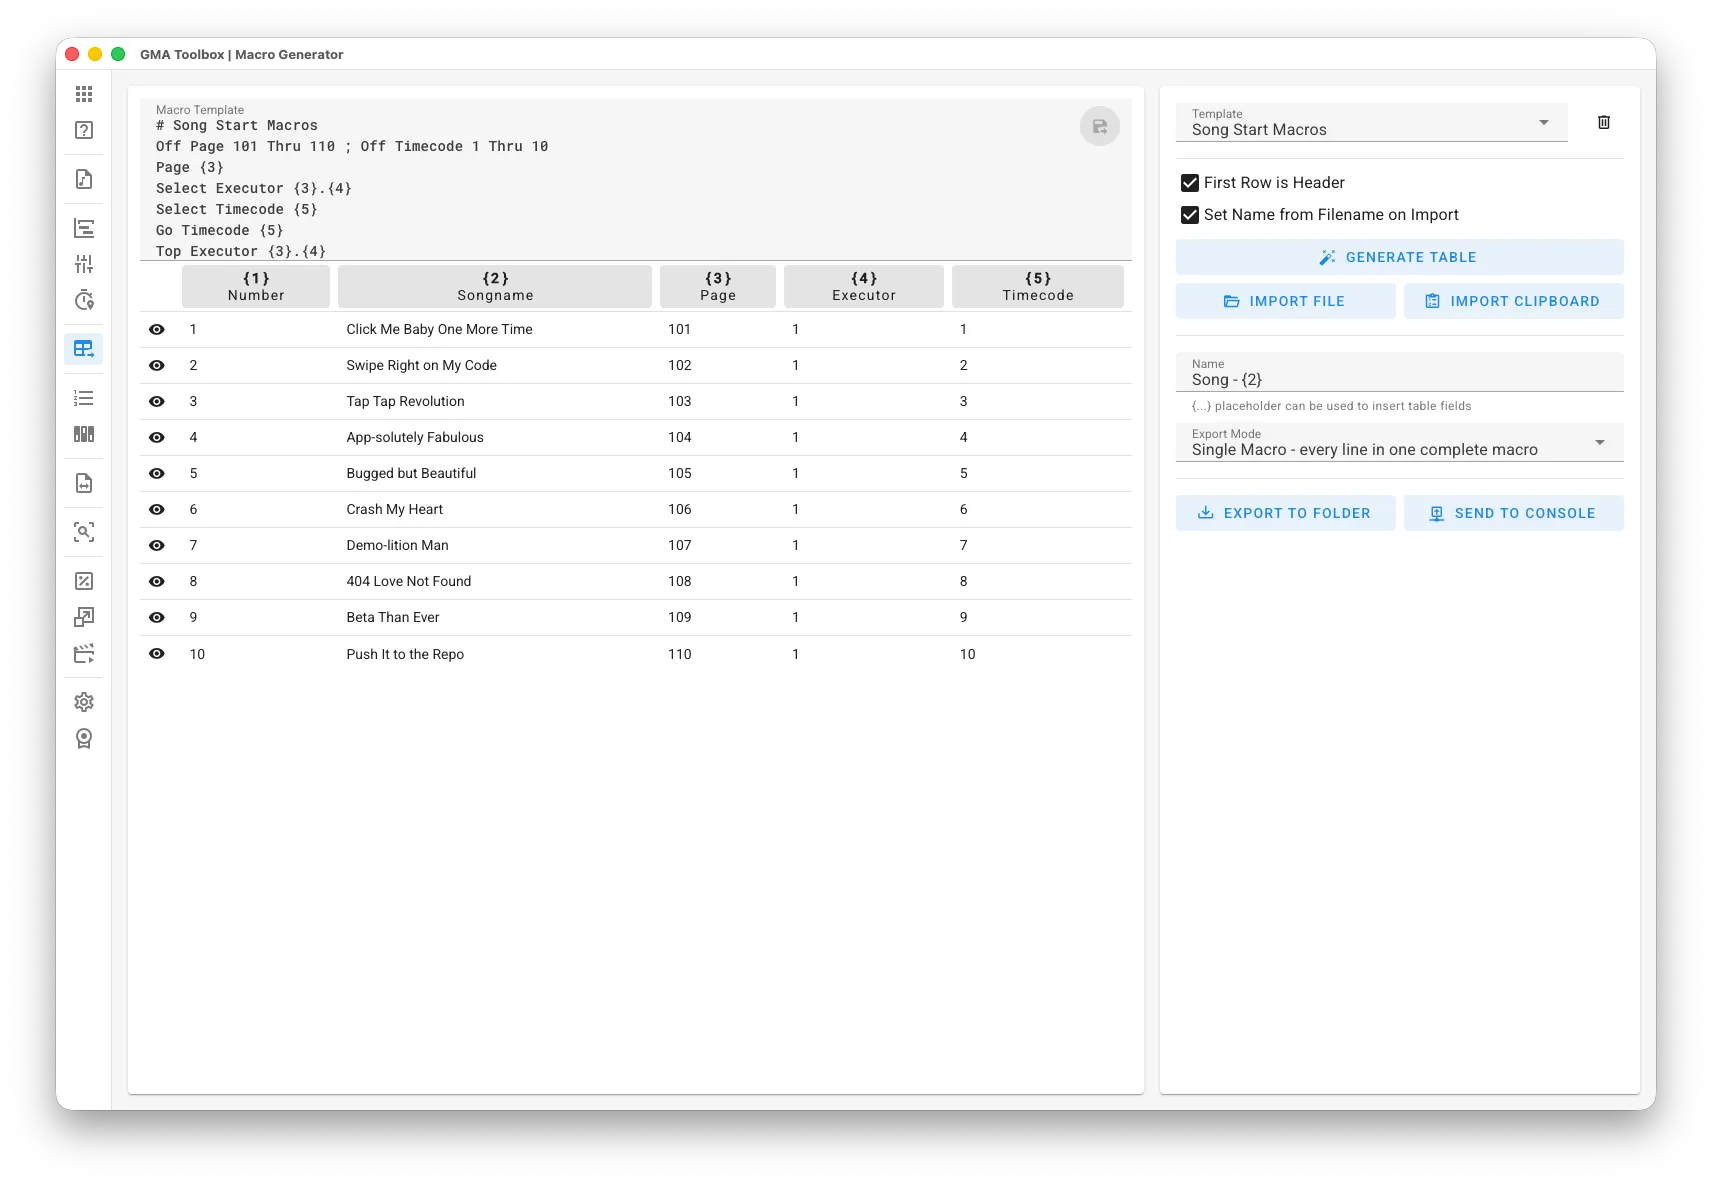
What it does
Section titled “What it does”- Builds macros from a template
Import a table, apply a template, and get either one macro that holds every row or a separate macro per row. - Keeps your templates
Save templates and load them again, so the same job always produces the same result. - Covers everything from presets to show setup
Build rehearsal macros that switch pages and executors per song. Build XYZ preset macros from position data, patch fixtures to DMX addresses, or write cuelists with commands inside them.
How to use it
Section titled “How to use it”- Prepare your data:
- Build your table in Excel or any other program, with one column per field you need.
- Import the data:
- Set the import options first.
Set the delimiter and the column names on the Settings page. To check the format of your file, open it in a text editor and read the first line. - Import File reads a CSV file. Import Clipboard pastes from Excel and similar programs.
- Set the import options first.
- Write the macro template:
- Create, load and save the template you need.
- Use placeholders to pull in your data.
{0}is the current row number.
{1},{2},{3}and so on are the columns. - Lines that start with “
#” are ignored.
- Set the export options:
- Give the macros a name. For individual macros, put a placeholder in the name to pull in table data.
- Choose the export mode: one macro with every row, or one macro per row.
- Export the macros:
- Manual import: save the macros to a grandMA2 or grandMA3 folder, then import them on the console.
- Direct import: send the macros straight to the console. The console asks you to pick the first macro ID.
The screen explained
Section titled “The screen explained”Import
Section titled “Import”- First Row is Header: treats the first row as the column titles, and leaves it out of the macros.
- Set Name from Filename on Import: fills the export Name field from the name of the imported file.
Export
Section titled “Export”- Name: the macro name. Add a placeholder to pull in table data when you export individual macros.
- Export Mode: one macro holding every row, or one macro per row.
Table columns
Section titled “Table columns”- Columns: the column title. Click it to drop its placeholder into the template at the cursor.
- Rows: one row per data entry.
- Eye icon: shows a preview of the macro built from that row.
Manage templates
Section titled “Manage templates”- Save a template: click the save icon in the template editor.
- Load a template: pick it from the Template dropdown.
- Delete a template: click the delete icon next to the dropdown.
Three settings can live in the template itself:
| Write this at the start of a line | What it does |
|---|---|
# followed by a name (first line) | names the template |
# Name = ... | sets the export name |
# Mode = single | exports one macro holding every row |
# Mode = individual | exports one macro per row |
Generate a table
Section titled “Generate a table”Sometimes you only need a run of numbers instead of imported data.
- Click Generate Table.
- Enter the First Item and Last Item numbers. Reverse the order if you need to.
- Enter the Item Text. Use
{0}for the current row number.